Demo Wedding Video using AWS
How We Use AWS to Host + Share Wedding Videos
After many years and 1,200+ videos uploaded and stored Vimeo, the time had come for us to find a different solution for sharing our videos online. I found Amazon Web Services (AWS) to be a solution for storing and sharing our documentary edits for our wedding video clients.
The Pros
– Relatively low cost
– High quality playback
– Long term storage solution
The Cons
– Basic knowledge of AWS required
– Process for efficient multiscreen delivery is not user friendly
– Risk of takedowns still exists on AWS
The Process
TL;DR: The first and easiest method was simply to upload the video files to my S3 bucket, make them public, then copy and paste the URL into my WordPress website for playback. There’s sooooo much more to this process, however, so if you want to understand your options, read on.
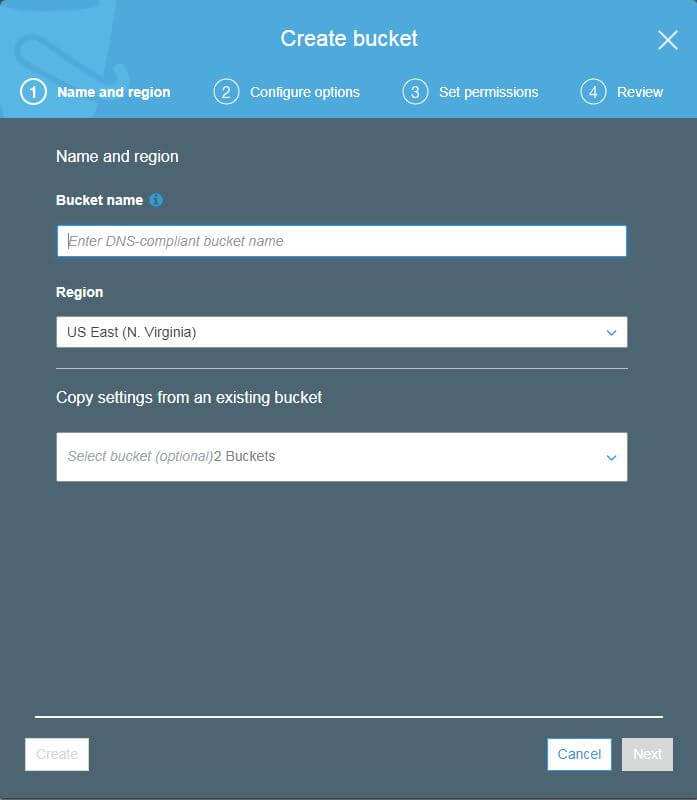
The nitty-gritty details: To get started, you’ll want to create a free account on AWS. Doing so will grant you access to a myriad of over 120 cloud services, and the amount you’ll wind up paying will be based on your usage. Video storage (and more generally, file storage) is one of many services offered by AWS, and those files can be stored by creating what’s called a “bucket” in S3 (which stands for Simple Storage Service).

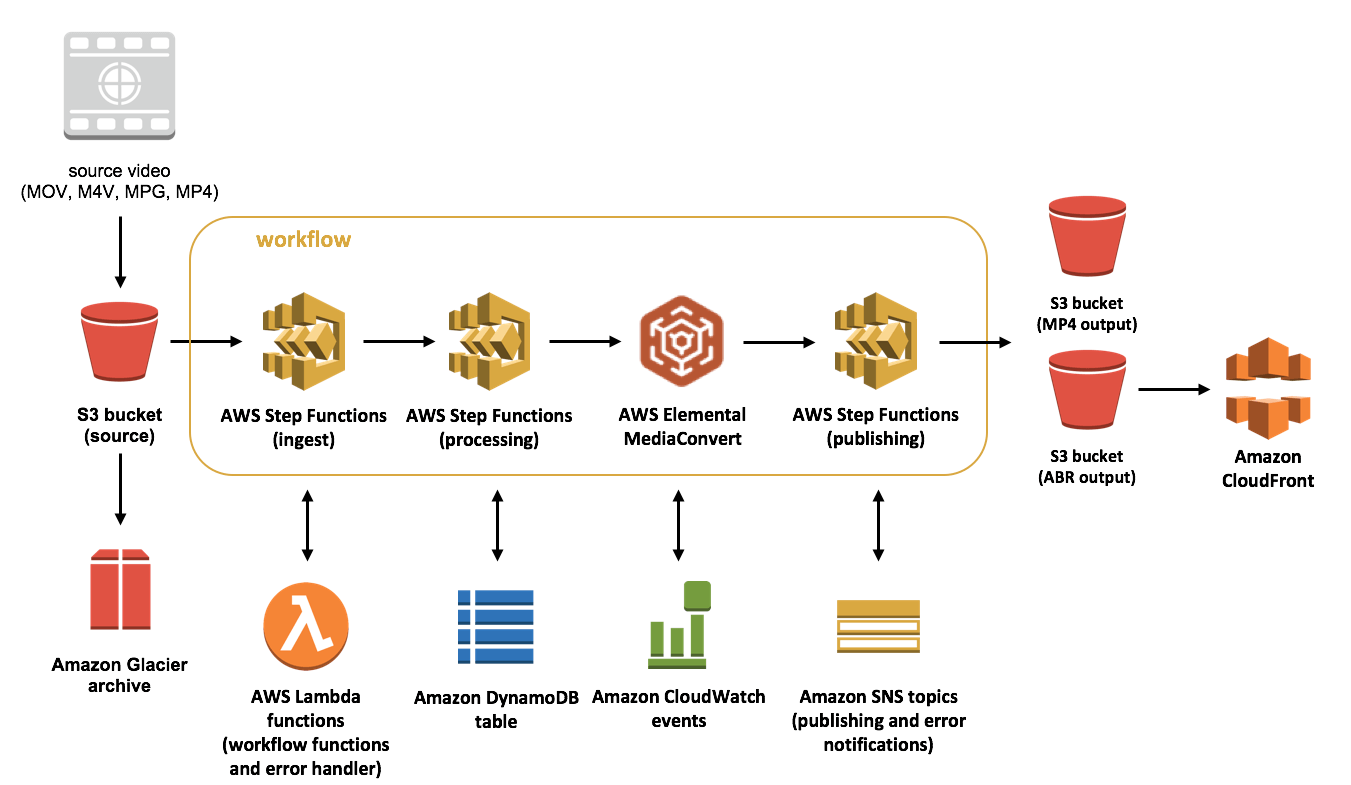
If you’re anything like me, you’ll quickly realize in the first step of this process that using AWS is not necessarily a “simple” solution. Instead, Amazon gives you the “Ray Roman a la carte” model of choosing which services you want to add, then it charges you accordingly. Do you want to have AWS convert your video files into lower resolutions for more efficient playback? Both MediaConvert and Elastic Transcoder can do that, but you’ll need to pay for usage of either of those services. Would you like to stats? There’s CloudTrail. And CloudWatch. I couldn’t tell you the difference. We are not currently tracking views considering our doc edits are shared privately with our clients and will receive minimal views (usually no more than 20-30 views per year based on historical view counts on Vimeo).
Once you have your bucket configured to your specifications, you can start uploading files immediately. You’ll want to be sure to make those individual files “public” after uploading which will allow them to be accessed and embedded if you so choose. Depending on your needs, there are several ways you can share video files. Rather than provide my own summary, here’s more info and a marginally helpful chart in case you’re interested.

I explored two methods for sharing video files via AWS on my website. The first and easiest method is simply to upload the video files to my S3 bucket, make them public, then copy and paste the URL into my WordPress website for playback. The second method involves using Elemental MediaConvert (or it’s predecessor, Elastic Transcoder) to transcode your uploaded video files into a variety of formats for efficient playback on any device. I was able to successfully configure this process, but I found it to be extremely complicated and time consuming. I also did not want to pay an additional fee for a player (such as JWPlayer), and I found options like Video.js to be yet another layer of configuration work I didn’t want to invest in learning or maintaining.
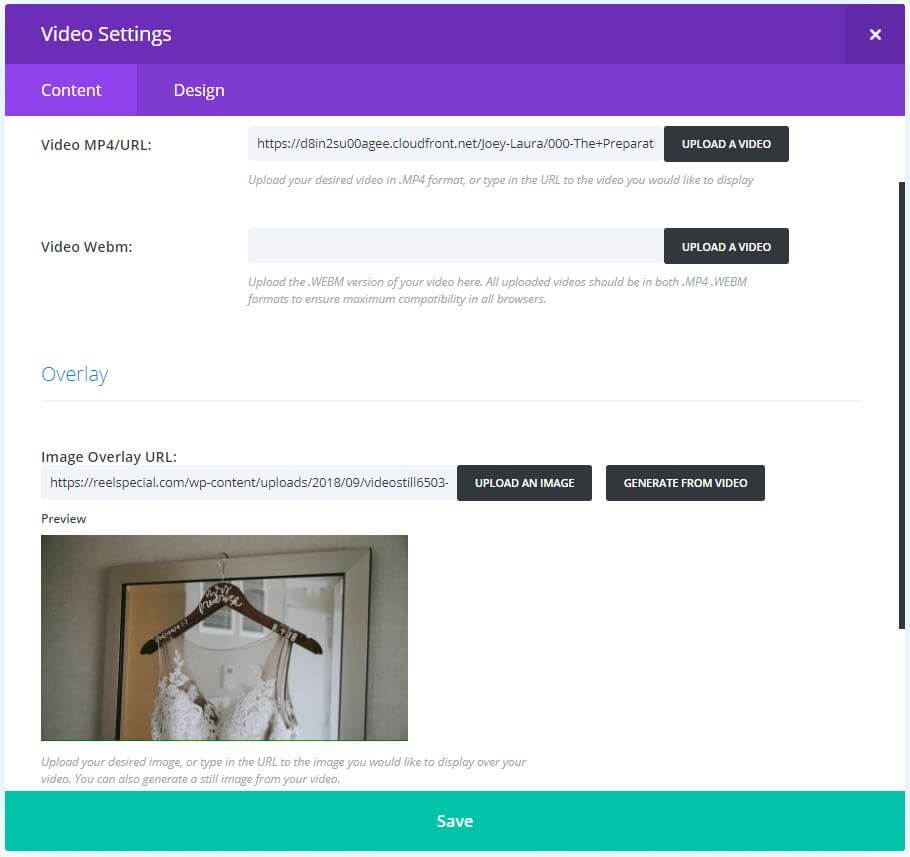
All that in mind, I ultimately chose the first method with one variation; rather than source my video files directly from the S3 URL, I created a CloudFront distribution channel which essentially allows me to more effectively protect my bucket. Rather than use the URL “https://s3.us-east-2.amazonaws.com/reel-special/Joey-Laura/Preparations.mp4” which would allow direct bucket access, I instead use “https://d8in2su00agee.cloudfront.net/Joey-Laura/Preparations.mp4” which to a certain extent masks the directory path to my bucket. It’s a subtle change and I’m still learning about how best to configure all the security settings, but ultimately the CloudFront distribution channel will be key down the road in maintaining privacy for my clients’ videos.
To deliver the content, I use a WordPress theme on my website that includes a video slider, and within the slider settings I am able to add a video cover image so I made sure to export a video still to give our clients an appealing presentation when they access their documentary edit. Here’s a snapshot of what it looks like behind the scenes.

I should also note that when we send our clients a link to their documentary edit, we password protect the page so the number of people who access is typically limited to our clients and immediate family who receive the link and password from the newlyweds. This will inevitably help keep our costs down with AWS and also minimizes our risk with potential copyright issues. One other note: we only use licensed music, but unfortunately that has not stopped Vimeo from taking down our videos forcing us to file a counter-notification to have our work restored. This process is very different than what we’ve experienced with the content-match systems used by YouTube, Facebook, and Instagram, but that’s a whole different topic to discuss elsewhere at another time.
Once the videos and overlays are in place, we simply publish the password-protected page and send the link to our clients around the same time they receive their flash drive from us (which contains the same edited wedding files). We explain to them that this private web link will allow them to share their full wedding video discreetly with loved ones without having to share or make copies of the flash drive. We also include some additional info on the clients’ private page (such as how to leave a Google review for us). In the near future, I want to further customize this playback experience by providing a clickable table of contents with video titles.
In the meantime, you’ll see that the order of the video files plays as it would if they were retrieved from the flash drive: 1. The Preparations (we do a special “prep highlights” for each of our clients) 2. The Letters & Gifts 3. The Story of How We Met 4. The First Look. etc.
So without further ado, scroll down to see our new slider in action and enjoy the show! If you found this info helpful, we’d love to connect with you on YouTube + Instagram so drop us a comment or shoot us a message on either of those channels!